Mark Langford's KR2S Project Page
Canopy Frame Construction Page
created August 1996, updated Oct 20, 2004
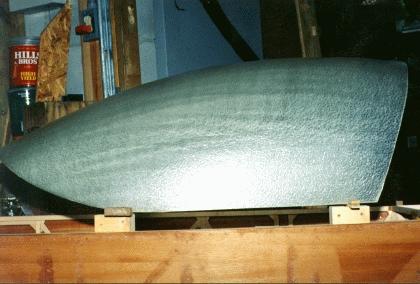
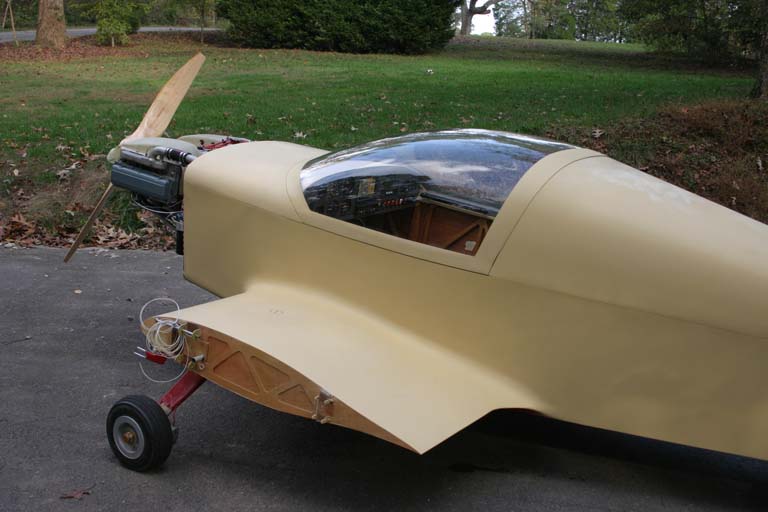
OK. Here's a Dragonfly canopy which needs to be mounted to a KR2S fuselage. How you gonna do it?
I first placed the canopy on the fuselage. trying to locate it where I thought I'd have enough headroom, and so that its forward edge would not be over the fuel tank. That turned out to be at a location about 17.5 inches from the front edge of the fuselage.
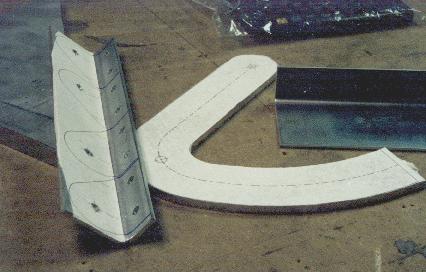
I took two pictures of the Dragonfly canopy, one from the side and one from the rear. The curves were then scaled and normalized to proper dimensions and placed on my 3D KR2S model. curve.
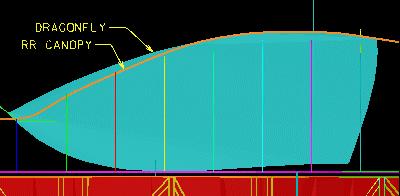
These photos were then digitized into bspline curves in a CAD program. I used a Dragonfly canopy (the source is listed at the bottom of this page). I chose it because it is designed for a plane that is roughly 8 inches wider than the KR2S, And because it is thinner and more flexible, would be easier to deform to fit my 3" wider fuselage. This canopy can easily be used on stock width KRs, as well as those stretched 8" or so. The R/R KR2S canopy is 3/16" thick, and may be quieter than my 1/8" thick Dragonfly canopy, but I can think of many other noise sources which would factor into that equation. The Dragonfly was also about two hundred dollars cheaper, and shipping was $70 rather than $160, but that's a geographical consideration.
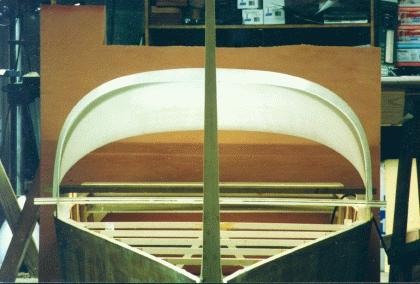
Front view.
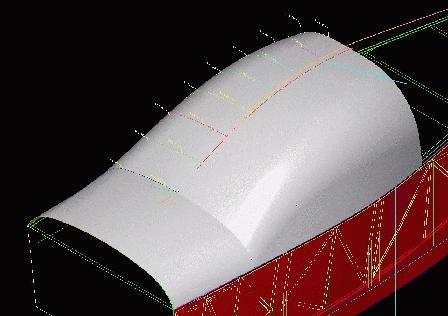
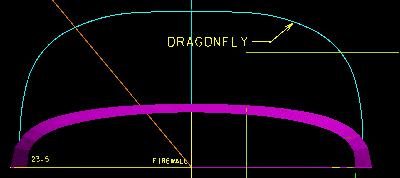
The two 2D curves were then turned into a 3D surface using the side view curve, the upper longerons, and the front view

With the 3D model built, I was able to design a nice looking firewall and instrument panel which would blend with the canopy.
Once these were designed, I plotted out full size templates for the firewall and panel. These were used to build the fuel tank and forward deck. It's easier to build a canopy frame if the forward deck is already in place. But you need a canopy in place to ensure that it fits forward deck that you're building...

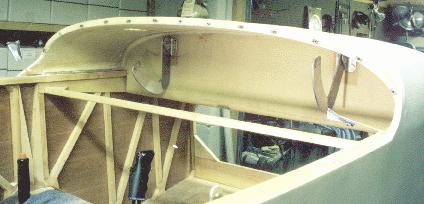
The canopy frame rails which sit on the longerons were made from 1/4" Clark foam which had been covered with 2 BID of 5.85 oz glass on each side (a foam sandwich). I made a 2' x 4' sheet of it, and hot glued it lightly across the longerons. A router with a laminate trimming bit was then used to cut the frame sides to a perfect match with the upper longerons. I actually used three layers of the sandwich on my frame, but only because all I had was 1/4" foam. One layer of 3/4" foam would work almost as well, depending on what kind of canopy latching system you plan to use.
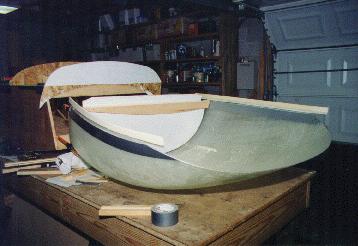
I then stripped off a 1.5" strip of fiberglass from a piece of sandwich and epoxied it to the edges of the canopy to provide a connection between the outside of the canopy and the frame rails The frame rails which had been built in place using the router were then offset toward the center of the fuselage just enough to allow for the thickness of the fiberglass which was added earlier.
The canopy was then placed on the frame side rails, and epoxied and microed into place, using wooden blocks strategically located to force the canopy (it's a Dragonfly, and therefore, a few inches wider than my fuselage) to conform to the fuselage and frame rails. After curing, three layers of 9 oz fiberglass tape was added to each side of the canopy where it meets the frame.
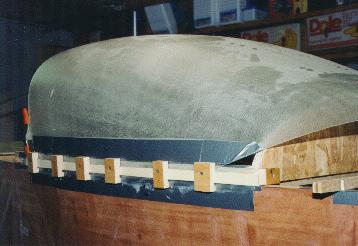
After the front deck was built, I covered it with duct tape and glass the forward edge of the canopy to the top of the deck. A reinforcement consisting of foam and glass was then added to the inside of the canopy to stiffen it up.
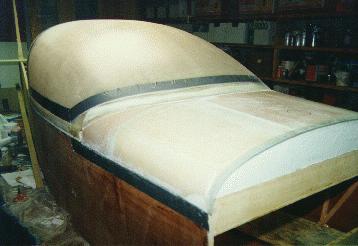
Here's the final product, almost. Next is to do something about the front edge, where it meets the fwd deck. I blended it into the deck, and then cut the canopy away, leaving a lip for the canopy to fit up against on the forward end. This provides a good wind and rain seal, and is a perfect fit from deck to canopy, since the canopy frame was made using the deck as a mold.
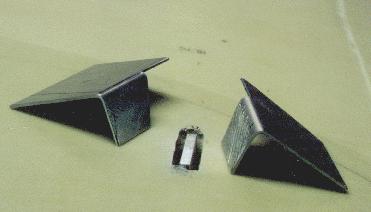
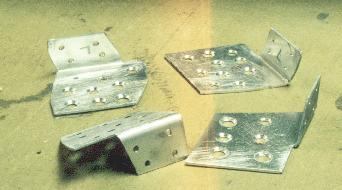
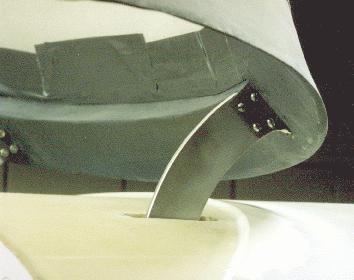
The hinges are geometrically similar to VW Beetle hinges, but are made from 1/4" 7075-T6 aluminum for maximum stiffness. The brackets were plotted out from a CAD file file, and glued to the aluminum to ensure accuracy. Here's a full size pdf version .
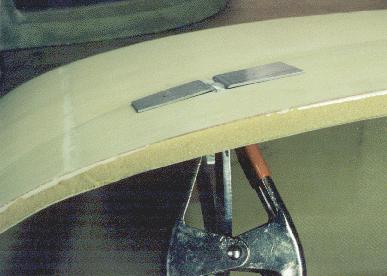
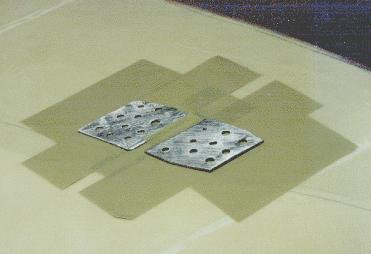
The two attach brackets were made from 1/16" aluminum, but I should've made them thicker. These attach to the canopy sill with flox, screws, and carbon fiber reinforcement.
These reinforcements are bolted to the hinges (which are fastened to the bracket, which are fastened to the hinge bulkhead) with #6 screws and nuts.
Here the brackets are shown with a bunch of holes drilled in them, so that the flox and penetrate the hinge and connect to the carbon fiber overlayment.
Duct tape is placed under them so flox will stick only to the canopy bottom, and not to the forward deck.
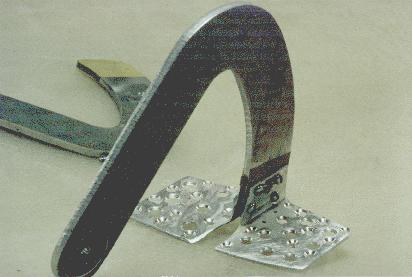
The hinge assembly before mounting to the brackets.
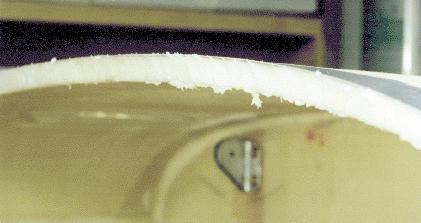
The hinge attach bracket is visible under the forward deck. Here the forward deck is being floxed to accept the panel mounting nutplates.
The back side of the panel, ready to be squished into the flox in the aft edge of the forward deck.
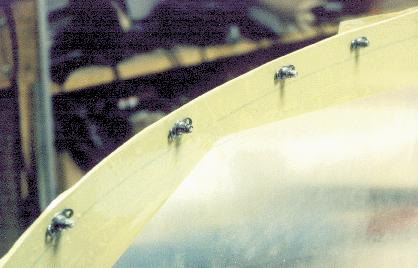
Canopy hinges
A view of my canopy hinges mounted to their bulkhead under the front deck.
This is my final canopy/front deck interface. The hinge is a 1/4" 7075-T6 piece for maximum stiffness.

Front view. Although I used duct tape around the Spray Lat coating, I quickly learned that duct tape and masking tape are NOT the thing to use. They both leave a nasty residue that can etch the acrylic and ruin the canopy. Electrical tape is the way to go....it's easy to put down in whatever shape you want, and if it leaves any kind of residue, WD-40 wipes it right off. Make sure you cover the Spray Lat near the edges with three or four strips of electrical tape (wide, not deep) so that no paint or primer will come in contact with the Spray Lat. When it came time to peel the Spray Lat away, I learned the hard way that primers adversely affect the coating, making it very difficult to remove.
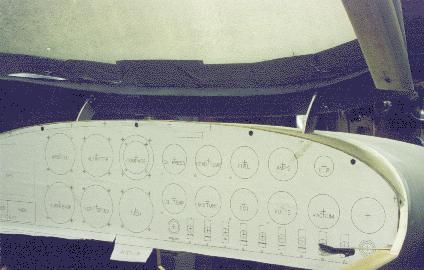
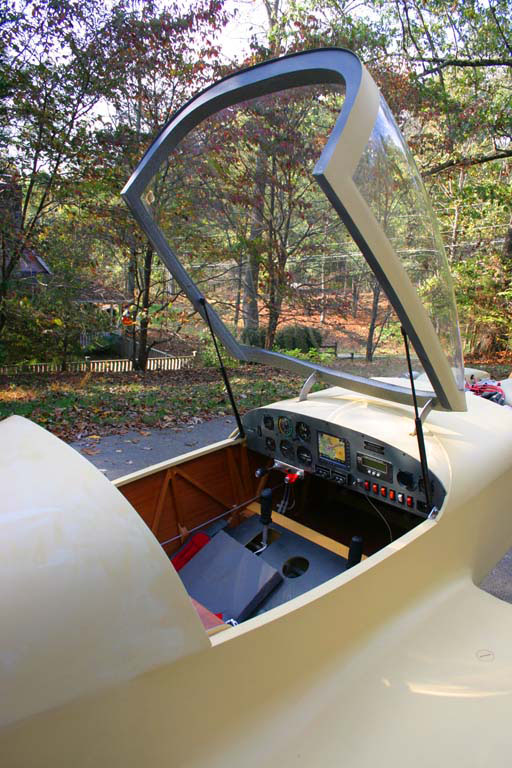
Canopy and instrument panel installed. Panel is covered with a CAD plot of what my instrument panel will look like.
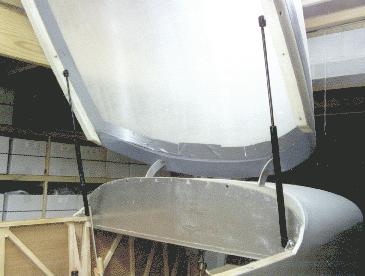
Canopy struts have been installed. They're each rated at 20 pounds of force when extended, and have internal valving to slow extension considerably. I got them from Magnus Mobility Systems in Orange, CA at (714) 771-2630. Part number is 752940. They are 585mm long extended, with a 250mm stroke (the best ratio I could find). They are made by Stabilus, and have the familiar trade name of Lift-o-mat (TM). You'll also need four ball studs (#102431). I figured for such nice struts, I was going to pay dearly, but they were only $17 each. That sure beats the $5 each that I paid for some from the junkyard, which turned out to exert 60 lbs of force each! They would have catapulted my 18 pound canopy half way to town.
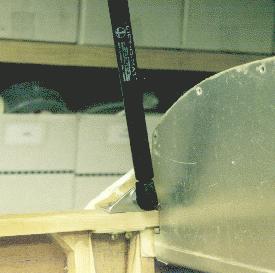
I tried to think of a better way to fasten this mount to the longerons, but bolts won in the end. 20 lbs is a lot of force, so they really needed to be mounted on top. And this location gives the highest opening of the canopy. I reinforced the longeron with plywood on the bottom.
The ball studs that mount to the canopy were screwed into 4130 inserts that I threaded prior to floxing into the canopy frame. I really worried about the strength of my frame, but I haven't even gotten around to floxing these in yet, and they're plenty strong. The one place that really needs to be strong on a canopy using this setup is where the hinges attach at the front. Lots of carbon fiber would be a good idea.
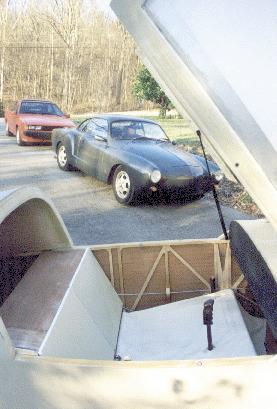
The canopy opens almost 70 degrees, leaving plenty of room to get in or out. I've been told that these should be mounted with the cylinders up, and rods down, so don't mount them as I show here! Otherwise the seals can go bad in about 6 months, but I haven't seen any evidence that this is a problem (after 5 years).
Before I put these struts in, I was concerned that this system would be flimsy. It's actually pretty strong, but you can't treat is like you would the hatch on your car. The one place that really needs to be strong on a canopy using this setup is where the hinges attach at the front lip of the frame. Lots of carbon fiber would be a good idea. Although I think mine will work just fine, I'd probably use a method similar to what the Bam-Bi uses (see John Martindale's canopy), which is an easier, stronger, and more stable means of attaching the canopy to the airplane. Or maybe even the nylon roller method (detailed in Bengelis' book) that was used on the Perry Area 51 plane . There are more pictures of this plane on my 1997 KR Gathering page.
Update, as of October 2004
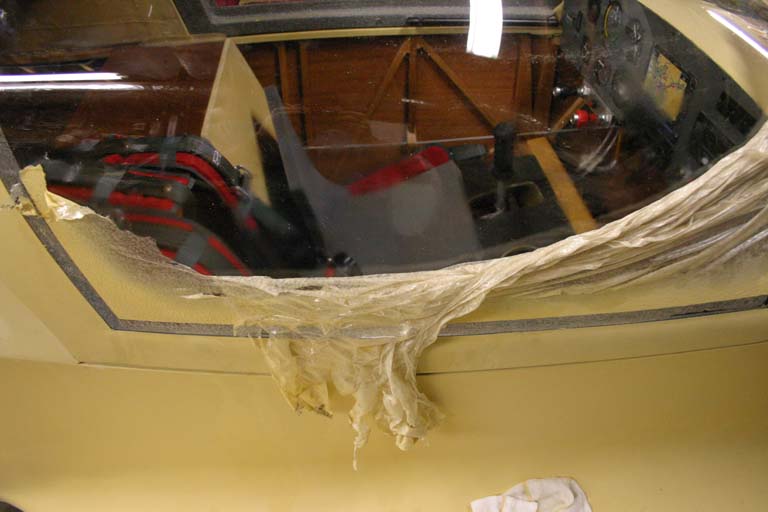
One thing I learned today was that the latex coating on the inside and outside of the canopy ages with time. After a few years, it gets sort of brittle. Even after 8 years, mine still peeled off, except in the areas where the latex has been "compromised" with primer and paint, especially Smooth Prime. Wherever Smooth Prime had come into contact with it (which was all the way around the edges), the Spray Lat had become very brittle, and practically fused itself to the plexiglas. I spent several hours trying to peel it off with my fingernails, old credit cards, spatulas, etc, but the final solution was to soak the junction with WD-40 and let it soak a few minutes, and then I could peel away another quarter inch or so. This works best when you start at the top and peel until you get to the the primer, and then fill the horizontal junction crack with WD-40 (see photo above). Once I figured out the process, it only took about an hour to finish a chore which I had been convinced was going to take me a couple of days!
Here's the final result. Not too bad looking, eh?
I think this'll work...
Dragonfly canopies can be bought from:
Aircraft Windshield Co
10871 Kyle St.
Los Alamitos, CA 90720-2410
(562) 430-8108
Also, Jeff Rodgers of Airplane Plastics in Tipp City, Ohio blows canopies for a lot of the kit manufacturers. He makes RV series, Mustang 2, and I think he makes a Dragonfly canopy as well. His number is 937-669-2677.
For a LOT more information on the Dragonfly canopy, including downloadable CAD drawings and other details, make sure you visit Mark Lougheed's excellent Dragonfly canopy page.
Return to the Mark Langford's Project