Mark Langford's KR2S Engine
Degreeing the OT-10 Corvair cam
originally created Dec 31, 2000
Why do you need to "waste" your time degreeing your OT-10 cam? Because if you don't you may never know that you're about to build an engine whose cam is 5 or 6 degrees retarded, stealing 5 horsepower and 9 lb-ft of torque from your propeller! This whole process is amazingly easy and quick to do. Not nearly as complicated as it may seem.
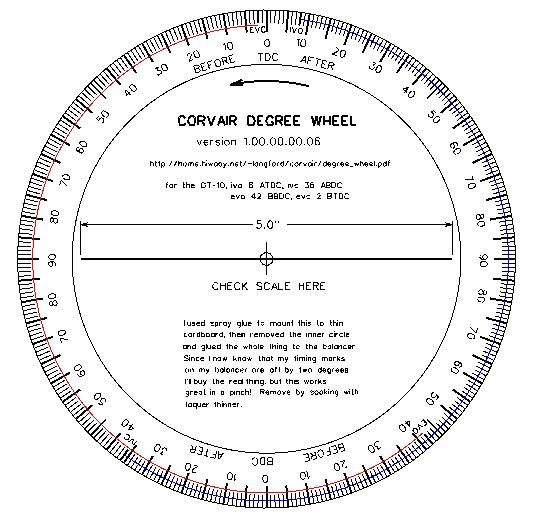
First you're going to need a degree wheel. You can download a PDF file of one that I made specifically made for the Corvair here, or if you want an inferior quality jpg version you can right click on the one above and save it to disk. When you print either of these, make sure you don't have "fit to page" checked when you print it or it won't be to scale.
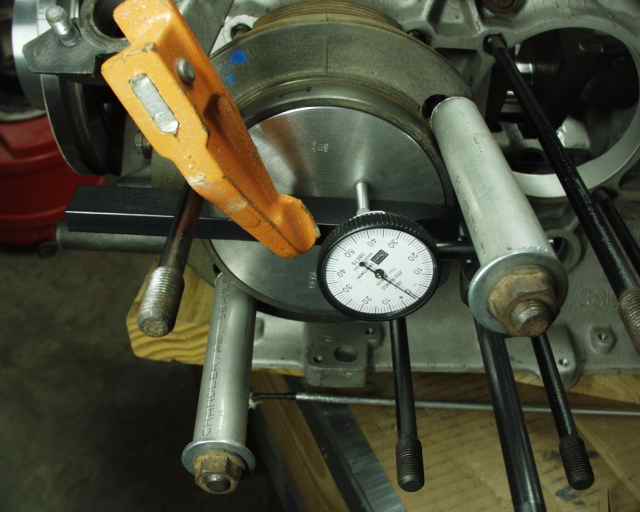
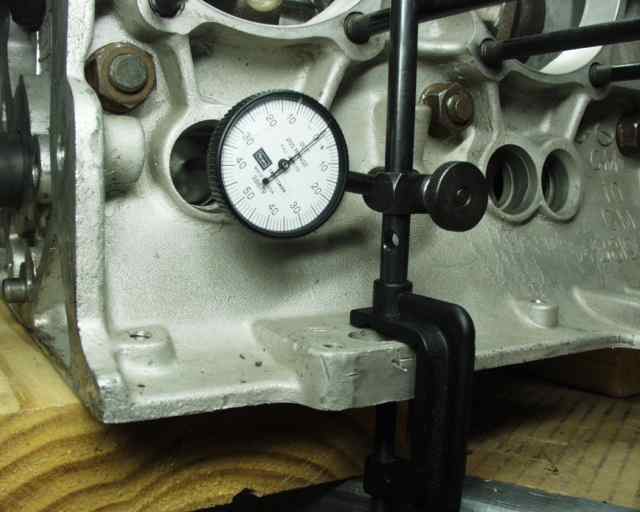
While this is not the only way to do this, I found it the easiest and most accurate way for this point during assembly. First you need to figure out where TDC REALLY is. This is easily done by installing the number one cylinder (closest to the distributor), rod, and piston. Use tubes of some kind (PVC, aluminum, whatever) to clamp the cylinder in place. Don't overtighten and break the fins off. Clamp a bar across the end of the cylinder to provide a "stop" for the piston, or you can get fancy and drill holes for it and clamp it across the remaining two cylinder studs (this would be the best way). Disregard the dial indicator in this picture. You can use it, but it's best not to. It's only in the picture because it was attached to the nearest thing that looked like a suitable bar for the job.
Rotate the harmonic balancer until the piston appears to be all the way out. See what kind of feeler gauge will fit in the gap, and then choose one a thousandth or two thicker. Slide the feeler gauge between piston and bar. Back the balancer up and slowly turn until the piston until the piston is stopped by the bar/feeler gauge.
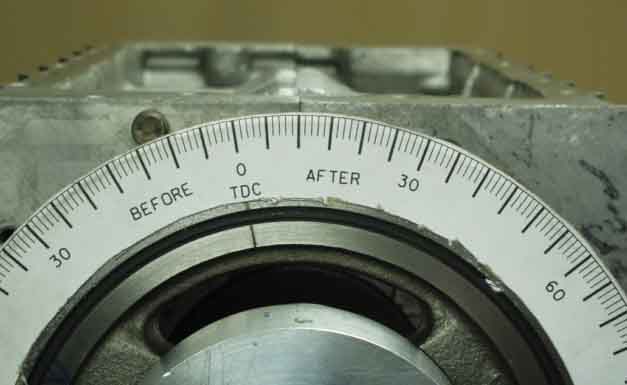
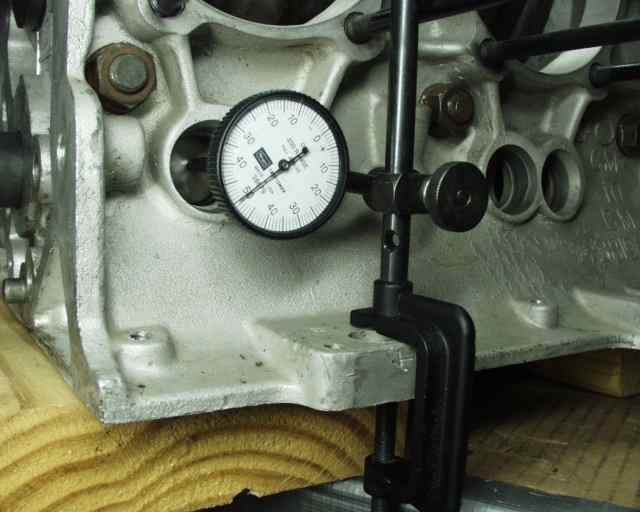
If you don't have the oil pump housing/distributor cover in place (it's easier and more accurate without it), use the case split to sight down and mentally draw a straight line to the corresponding point on the balancer, and make a mark there with a Sharpie. (Disregard the fact that there's a degree wheel on this pulley in the picture). Rotate the balancer back until the piston hits again coming from the other direction, and mark the balancer again. The two marks should be close together, and TDC is exactly centered between them. Now spray glue the degree wheel on indexing it to your NEW TDC.
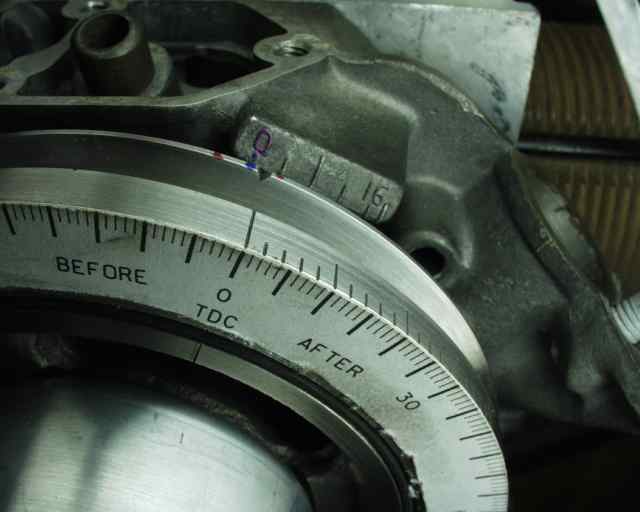
Or if your cover is in place and your timing marks are visible you can do it that way I did it, but the method outlined above is far easier to understand and keep straight in your mind, AND is more accurate because you have that case joint to "sight" your degree wheel. You can see by the above picture that I marked the two "stop" points in red, and then split the difference to come up with the blue line, which is off by two degrees from what the balancer's notch says. You can also see from this picture that it's kind of hard to read accurately, since the pulley is an inch from the mark, and you have no "reference points" to determine if you are looking straight on to the marks or not. But the cover's marks just confuse things and give you extra stuff to wade though to arrive at your numbers. Do it with the front cover off if at all possible and sight down the case seam. I used the blue TDC 0, and the blue mark on the pulley, but that's because I was too lazy to remove the housing.
Slide two lifters into the lifter bores for number one cylinder, except backwards, with the "flat" side out. It's not really flat, but since you're reading off the same place (assuming your indicator is perpendicular to it's surface) it won't matter. The one on the right is exhaust, on the left is the intake. Looking in from the top, spin the balancer until the lobe is not lifting, and set the indicator up so that it's just barely depressed. Rotate the engine until the lobe starts to move the dial indicator so you'll know which way it's going to go, then back up until the indicator moves no more in the opposite direction. Set it to zero and rotate it between the lobes to make sure that it really is at it's lowest point. If it's not, just find the lowest point and zero it again. You may have to reach in and push on the lifter to make sure it's in contact with the base circle. This whole process is probably best done with the engine on its side and gravity helping keep the lifters in place, but my dial indicator spring was sufficiently strong to keep them following the cam.
Now rotate back up the lobe until you hit .050" and stop. Look at your degree wheel and mark it down, as well as whether you were "before" or "after" TDC or BDC, assuming you are turning the balancer counter clockwise. And note (when spinning counterclockwise) whether it's about to open or close the valve. Back up and run around the cam again (on the "flat part") until the lobe comes around again, and mark the point at which you hit .050" again, and whether it's closing or opening. There's your two points for that valve!
Do the same for the other valve and you're done! Make sure that you're careful with the dial indicator, especially if it doesn't have much travel.
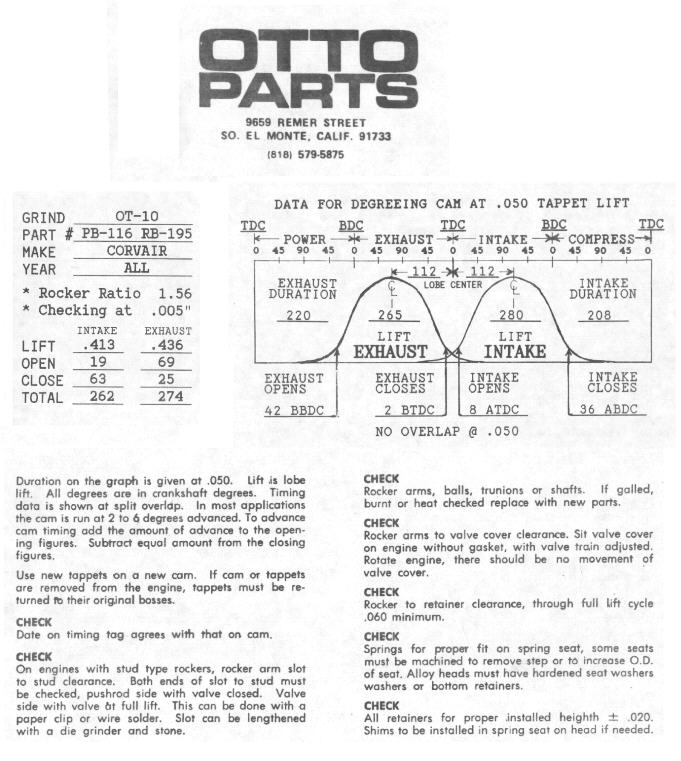
Here's what you need to compare your numbers to, using the numbers on the left. Or if you have to do this with the rockers installed (which will almost certainly give you erroneous readings), you'd use the numbers on the left, which have been multiplied by the rocker arm ratio of 1.56.
To synthesize the results, visualize that the degree wheel is fastened to the pulley and is rotating counterclockwise. That means that my 3 degree opening is actually 5 degrees earlier than the cam tag's 8 degrees ATDC. That's only 5 degrees, but when you consider that it closes at 29, which is 7 degrees earlier than the tag's 36, I'm only registering 206 degrees of duration, as opposed to the tag's 208. If you "normalize" and add one degree to each end, I'm really opening at 2 degrees, 6 degrees early. As for exhaust, I'm 6 degrees early opening and closing, but have the tag's 220 degrees of duration, so no normalization required. I needed to draw this picture to "see" what was happening. Now I have my desired 6 degrees of advance (see why I want 6 degrees at Cam Advance ) and I'm ready to go...
Return to Mark Langford's CorvAircraft engine.