Airspeed Indicator Calibration
Airspeed Indicator Calibration
created May 24, 2005
My first flight was rather exciting because I quickly realized that my airspeed indicator was nowhere near correct, despite it being brand new out of the box, and therefore assumed accurate.

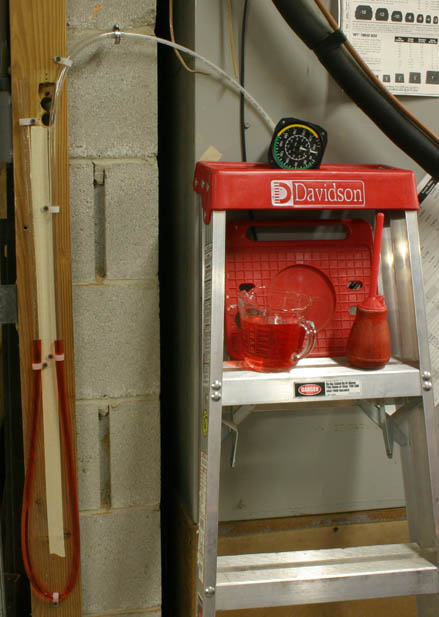
I found a website that sort of described this, but still left some to the imagination. It also had a bunch of calculations that would make most mere mortals shrink into the corner, but since I have a minor in math, I only wasted 2 hours trying to make the numbers work before I gave up. Then I found a couple of web resources that simply have a chart that gets "close enough for KR work". This picture tells the story. Clamp or tape some clear flexible tubing (1/4" up to 1/2") to the wall or a board or something, as long as it's vertical to facilitate the measurement process. This particular board is the framing for my garage door. Start by filling up the lower part of "U" with colored water, but NOT with the ASI connected. Only fill the bottom few inches so that the U is full but leave as much empty tubing above as possible. The more tubing you have, the higher the speed range you can check.
Now connect the ASI, and make sure that both columns of water are still at the same height with respect to each other. This can be difficult to get perfect, especially if you slide the tubing onto a fitting. Screw-on connectors work best, but a workaround with push on connectors is to wiggle it a lot to remove the residual pressure, or even give it a few hours to leak down to equilibrium. It's not a bad idea to let it settle for a while anyway to let the air bubbles rise to the top and make accuracy even better.

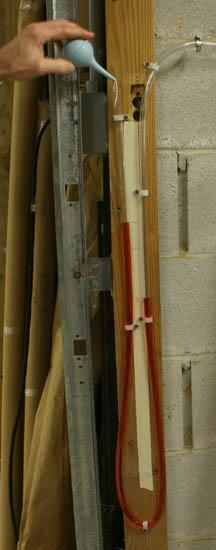
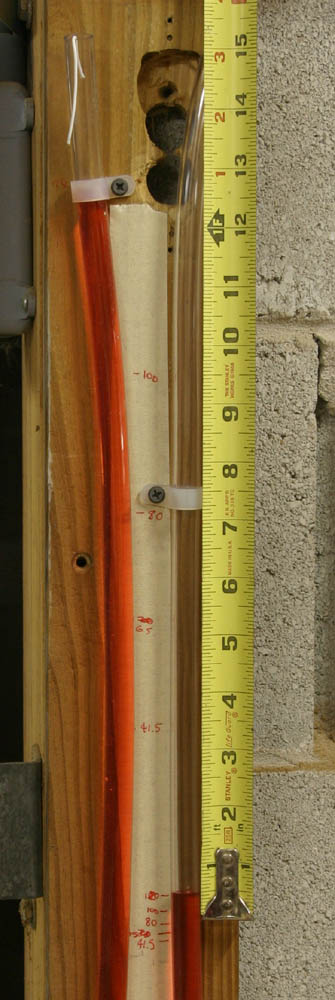
Now start adding colored water (slowly!) with something like this ear washer deal or better yet, an eye dropper for the lower speeds (it only takes a few drops for the lowest speeds, and accuracy is paramount), and slowly add colored water until the ASI reads 40 mph (or knots, whatever). Record the level of the miniscus of both columns of water by marking them, and labeling it something like "40". Add more water 'til you get to 50 and mark the level of both columns again using a different colored pen or marker (they will be very close together on the ASI side), repeating for as far as you want to go, or have enough wall and tubing. 48" will go 250 mph. I was only checking the low end, so 18" was plenty for me. Then measure the VERTICAL distance between each pair of color-matched points to get a "delta", and use that delta in the chart below to see how far and in what range your ASI is off.

I measured the 100 mph mark and got 9.5", rather than 4.94", so I'm off by 52%! I realize that the end of the tape is not exactly at the 100 mph mark, but it was close enough to determine that this UMA ASI is junk! I'd try to return it, but 7 years since purchased is certainly past the statute of limitations.
Check your results with the chart below (plagiarized from the web)
knots/mph inches
17.4/20 0.20
26/30
0.44
34.8/40 0.79
43.5/50 1.23
50/57.5 1.63
69.6/80 3.16
70/80
3.20
86.9/100 4.94
100/115 6.56
104.3/120 7.13
110/126.5 7.95
120/138 9.48
130/149.5 11.14
130/150 11.18
150/172.5 14.87
173.9/200 20.04
200/230 26.71
217.4/250 31.63
The first column is the airspeed in knots/MPH, the second column is inches of water difference. This also works fine without removing the airspeed indicator. Just hook the tubing to your pitot tube and proceed. If your pitot system leaks it will show you, but then you can't calibrate the ASI until you fix the leak. Having a perfectly calibrated ASI is no indication that your airspeed will be accurate in flight...static system problems can shift the airspeed indication up or down considerably based on conditions at the static port pickup point.
Even better is this excellent spreadsheet that Kevin Horton (Kitplanes writer) did in 2005. This allows you to use any random speed or inches of water pressure value, rather than specific exact points along the curve, to check your ASI. I've filled in the blanks with my December 2009 test of my ASI, and it really made the calibration easy. The "error plot" on the lower left shows the data points that probably should be discarded, as they are substantially off the curve. He also has an Open Office version on his web page on Kevin Horton's RV8 website. If you don't have Excel or Open Office, he has a much better chart than mine on his website.
Here are the formulas for the brave (again from Kevin's website):
For ASIs in mph:
water height (inches) =((1+0.2*(ASI/761.22)^2)^3.5-1)*407.51
For ASIs in kt:
water height (inches) =((1+0.2*(ASI/661.48)^2)^3.5-1)*407.51
For ASIs in km/h:
water height (cm) =((1+0.2*(ASI/1225.06)^2)^3.5-1)*1035.083
Contact Mark Langford (if you must) at N56ML "at" hiwaay.net (replace the "at" with @)
Return to Mark Langford's KR2S N56ML.


