Fiberglass Spinner
Fiberglass Spinner
created October 28th, 2007 (spinner created July 2006 so I could fly it to Oshkosh).
My first spinner was a "store bought" Cessna 150 spinner made by Aero-Fabricators in Lyons, Wisconsin, part number 1-340-100. It came with blade cut-outs for the 150 blades, but since the rotation is different, I had to do some more blade clearancing, but was careful to create a template of the first cutout and made the second one identical to keep the spinner balanced. The spinner also came with a back plate, which I match drilled (through spinner into backplate) and installed 10 equally spaced number 6 nut plates into. I say "equally spaced", but really there are two pairs of 5 equally spaced nutplates, due to the blade cutouts. I'll have to rustle up a picture of it one of these days.
So I installed it and flew around the patch, and immediately noticed a vibration that I didn't have previously. I was wondering if it was my imagination, but when I throttled back to 1500 rpm to start my landing descent, it became very obvious. It was bad enough that I didn't want to fly it anymore that way.
Then I remembered Troy Petteway telling me a similar story about his "store bought" spinner, and he'd been through two of them, both out of balance. He then made a carbon fiber spinner that turned out to be perfectly balanced. Now there's an idea! Except that carbon fiber is not only expensive these days, it's downright hard to find.
So I decided to use my spinner as a mold, since it wasn't good for anything else. This would also allow me to get some nicer looking blade cutouts that actually fit my spinner.
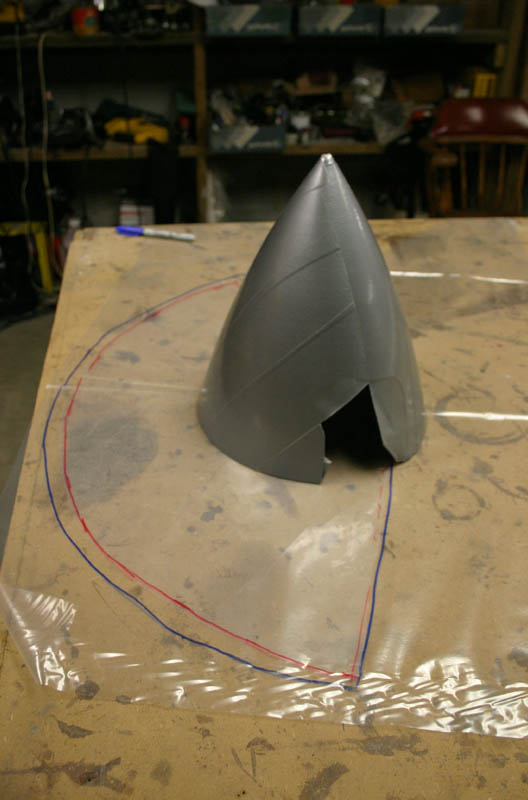
First I carefully installed duct tape on the spinner so that there were no overlaps in the tape (at least that was what I tried for), yielding a fairly nice mold release (make sure the duct tape you use doesn't stick to epoxy). Then I wrapped the spinner with plastic sheet to make a template for the fiberglass...
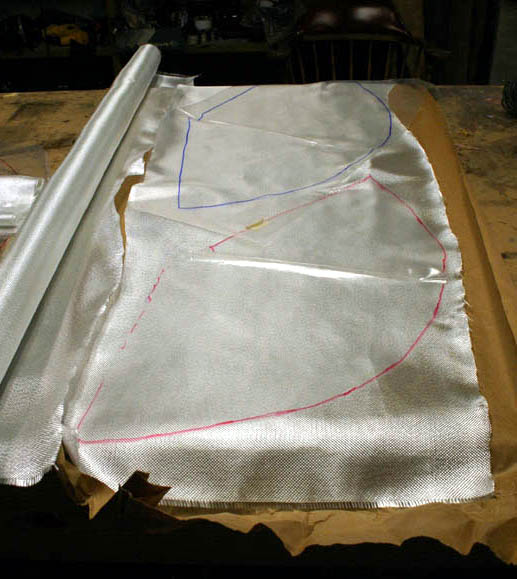
...used the templates to cut the glass roughly to shape (slight oversized)...
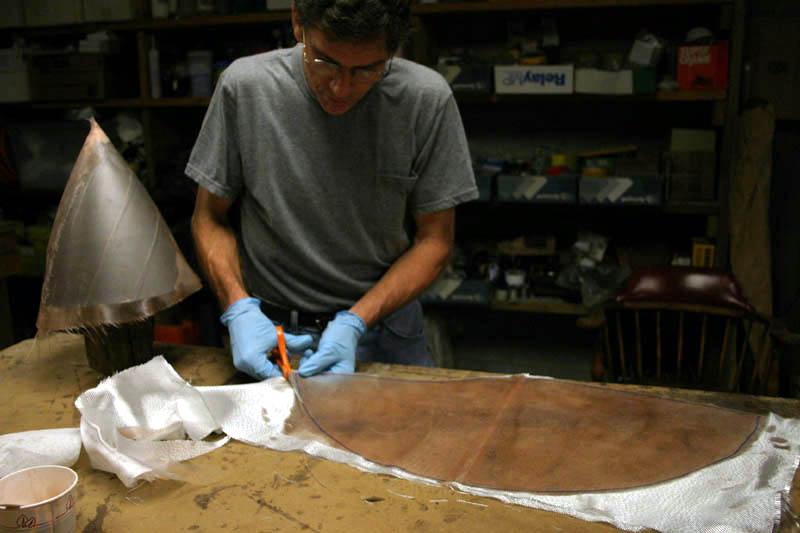
...and then wet out the glass. The plastic helps by ensuring that the glass is exactly the right shape, and it ensures that the fiberglass remains in that shape while it's being placed. It also makes it easy to position. When you get it exactly where you want it, you squeegee it in place and pull the plastic off, then squeegee again to reestablish contact where it may have been pulled loose.
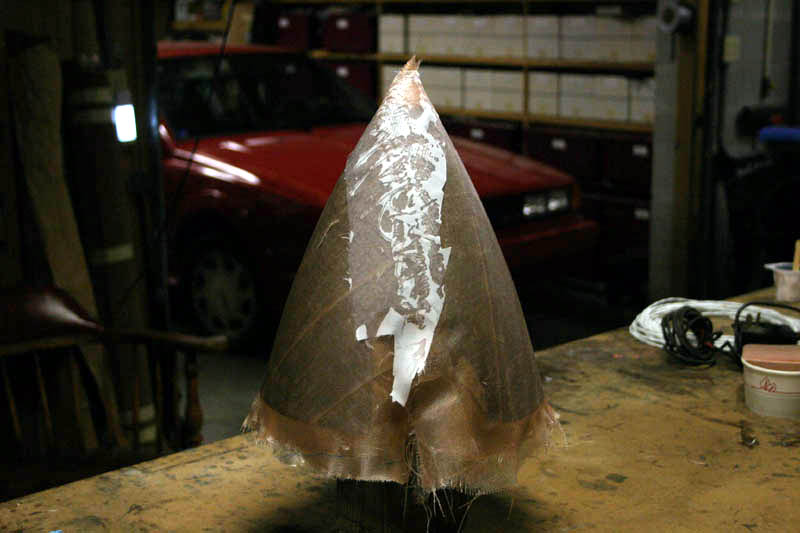
The scrap of white stuff in the middle of the spinner is "peelply". This is either thin plain Dacron or Dacron with a release agent applied to it. The purpose is to cover the seam that resulted from wrapping the glass around the mold. The peelply helps push the stragling strands of glass down flat, so when the epoxy cures, there's not a lot of glass shards sticking up to cut you or your sandpaper. Note that I put the seam over the blade cutout, so there's less of that "uncertain" overlap than there would be if the overlap had been somewhere else. Also notice that's why I laid up two separate layers one right after the other, rather than just doing two layers at once...this gave me an overlap on each side, offsetting the weight and hopefully maintaining balance. You can see that the nose is not exactly wonderful. Looking at this picture reminds me that I was not real hopeful of having anything airworthy when the process was over, but I had very little to lose other than a few ounces of epoxy and some fiberglass scraps.
After it was cured, I popped the fiberglass spinner off the "mold", which was easier than you might think. I used the aluminum spinner as a template to get close on the blade cutouts, then carefully Dremeled and sanded the new fiberglass spinner to clear the blades and had a tight fit to the backplate, and matchdrilled the spinner to the backing plate. I inverted the spinner and poured in some micro, which gave me something to sand into a point on the nose. The result was much better than I'd expected. I should mention that vacuum bagging to the inside of the spinner is another option, but I didn't have the stuff on hand to do that, and went ahead with the wet layup option.
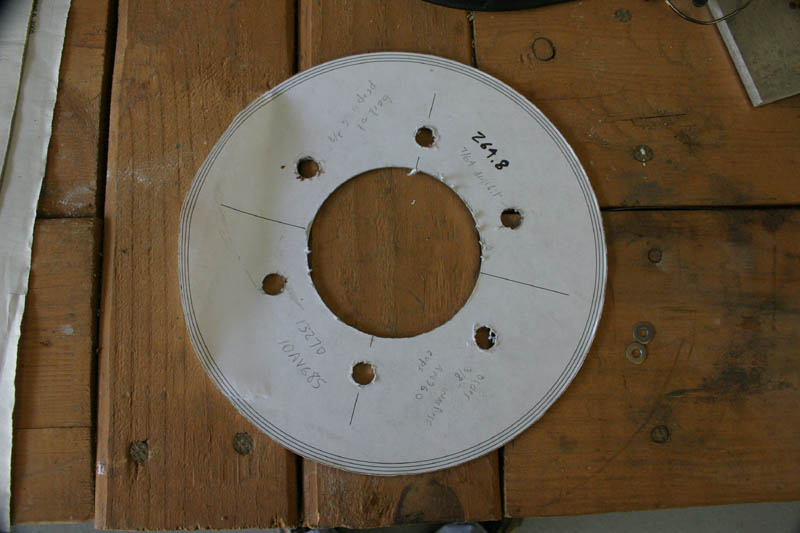
Next, I needed a front bulkhead. I used CAD and the computer, but you could do it with a compass. I laid out several concentric circles, one of which was clearance for the prop hub center, another for the SAE1 bolt circle, and several more out in the area where I thought the outer diameter was going to be. These I made .062" larger than the next, knowing that if it wouldn't fit under the spinner, I'd still have a nearby guide to go down to the "next size". I took the above picture after I'd pulled the template off the plate on the left, after all holes were drilled and the outside diameter had been made perfect. I should have taken the picture before I started removing the template. I used a can of 3M Spray Adhesive from Home Depot or the automotive paint store to fasten the template to the aluminum.
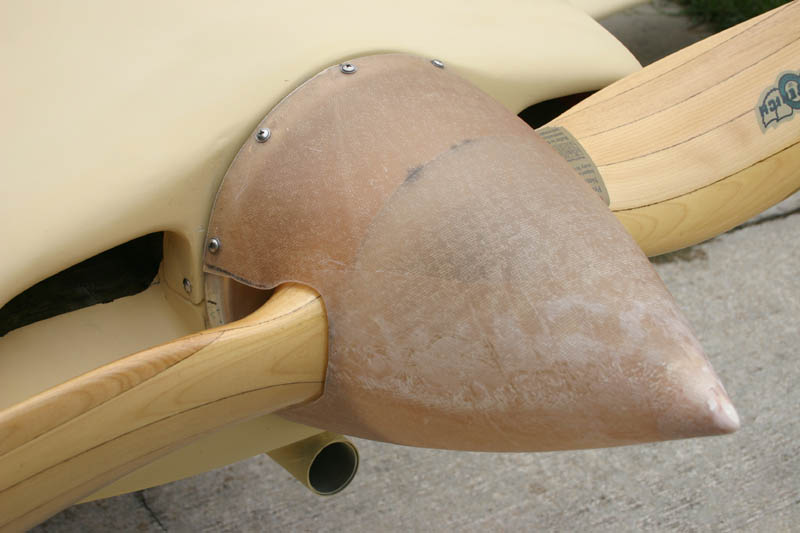
Here's the almost finished product, with aluminum "forward disk" bolted to the front of the prop, and the spinner installed tightly up against it. I flew this thing for a few hours without the forward bulkhead, and it was very smooth...waaaaaay very much smoother than the aluminum spun one that I paid money for. The black residue you see in the picture above is aluminum dust from something flexing around, so clearly things were moving (even though the spinner was very tight) and the disk would eventually have worn a hole through the spinner. So I needed to finish that front bulkhead.
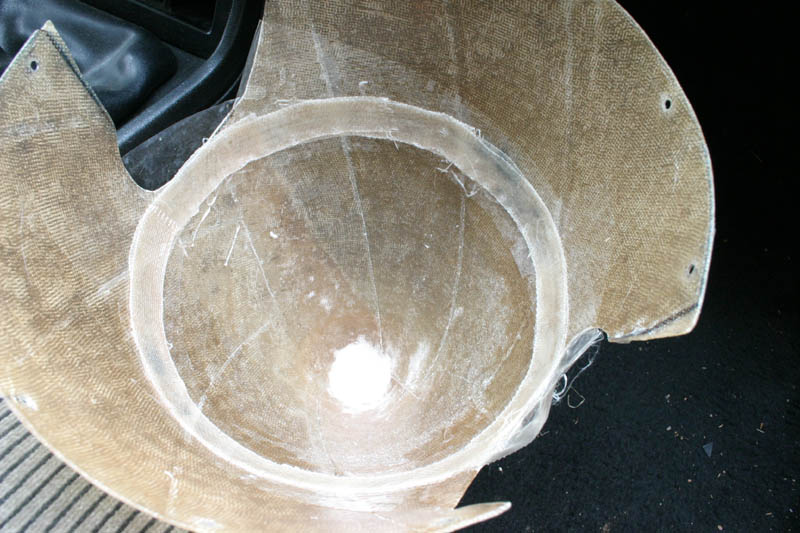
The next step was to wrap a little clear packing tape (the thinnest release tape that I know of) inside the spinner, so I could make a fiberglass band to interface with the front disk. I laid up two rounds of 1" fiberglass tape and let it cure.
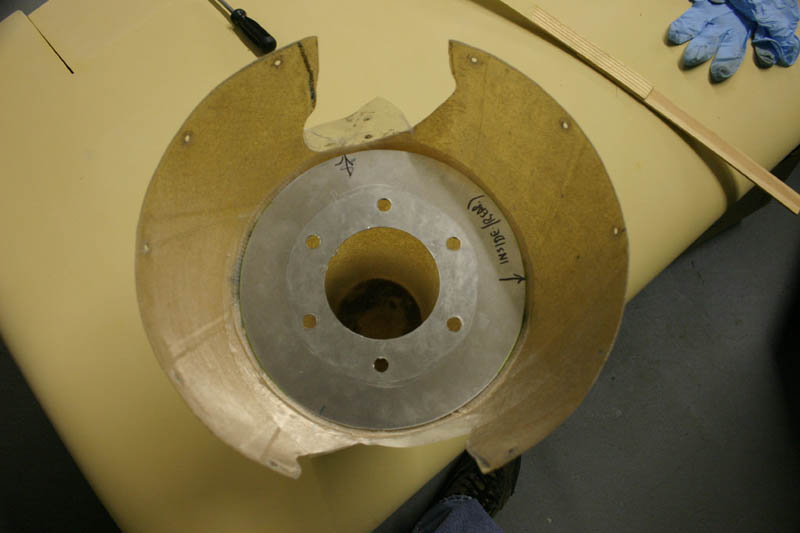
Then I put the disk in and marked a line in green Sharpie to show where I needed to put micro so I could join the tape ring to the aluminum disk.
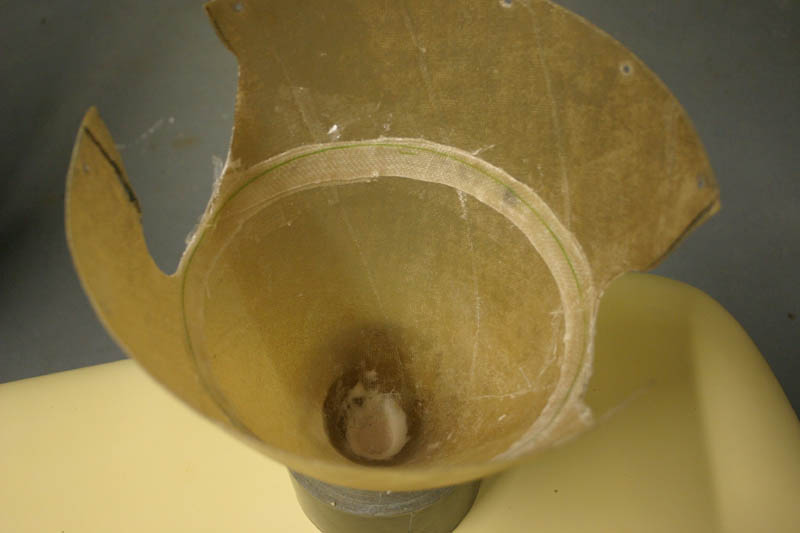
I mixed up so fairly thick micro (the lightest kind) along the green line, and then installed the spinner onto the spinner/prop/aluminum disk assembly and let it cure.
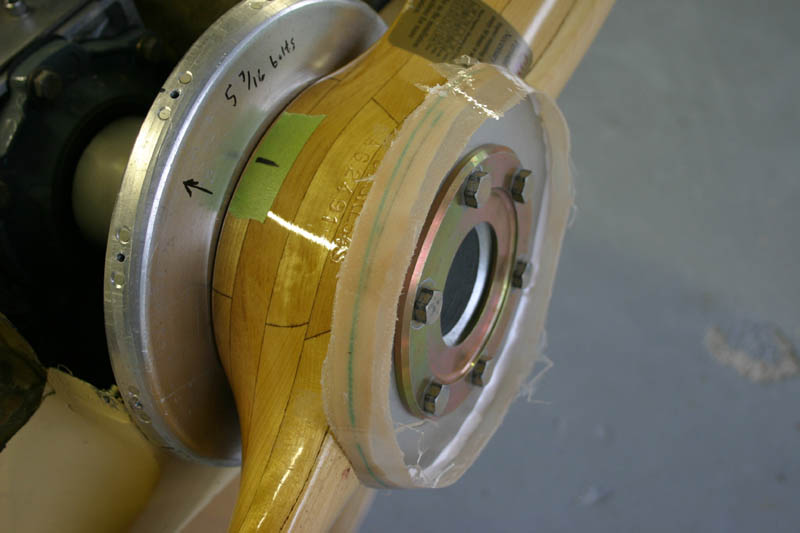
The next day I came back and removed the spinner screws, popped the spinner loose from the front plate (thanks to the packing tape) and I almost had a front bulkhead.
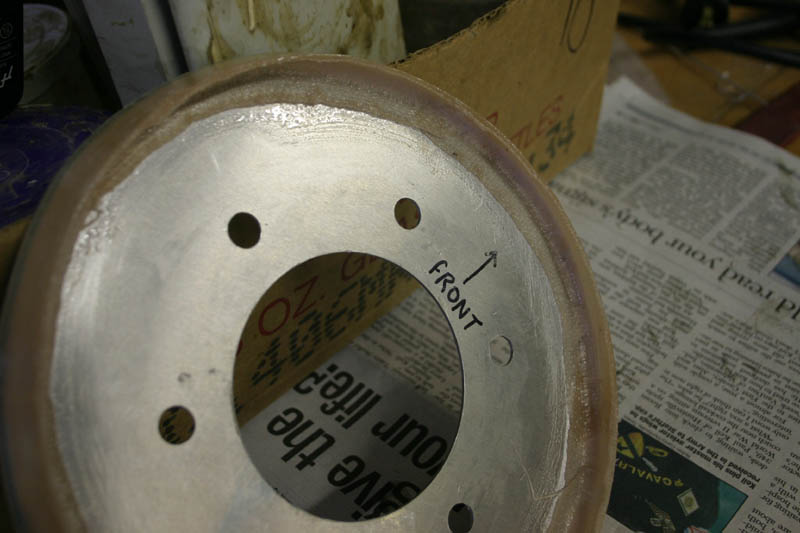
The last step was sanding the rear edge of the disk/tape band flat, then using a popsicle stick to put a uniform fillet of micro around the inside diameter of the forward side, then stipled another 1" tape into the fillet to finish the job. After that cured, I sanded the whole thing to a uniform thickness (that sounds difficult, but I'm talking a one minute job here), which almost guaranteed that it would be in balance. The good news is that is is very smooth, and after several hundred hours, has not showed the slightest loosening, despite the fact that I've not yet bothered to install any screws in the front bulkhead! It is also perfectly centered, with zero wobble, as far as I can tell. There are many KR's with spinners that make me worry, but mine is not one of them...
Contact Mark Langford at ML "at" N56ML.com (replace the "at" with @)
Return to Mark Langford's KR2S N56ML.


