KR2S NACA ducts
KR2S NACA Ducts
Written June 1, 2003
In an effort to make the cooling air from the cowling reenter the airstream with as little drag as possible, I decided to use NACA ducts to reintroduce the flow from the bottom of the cowling back under the fuselage.
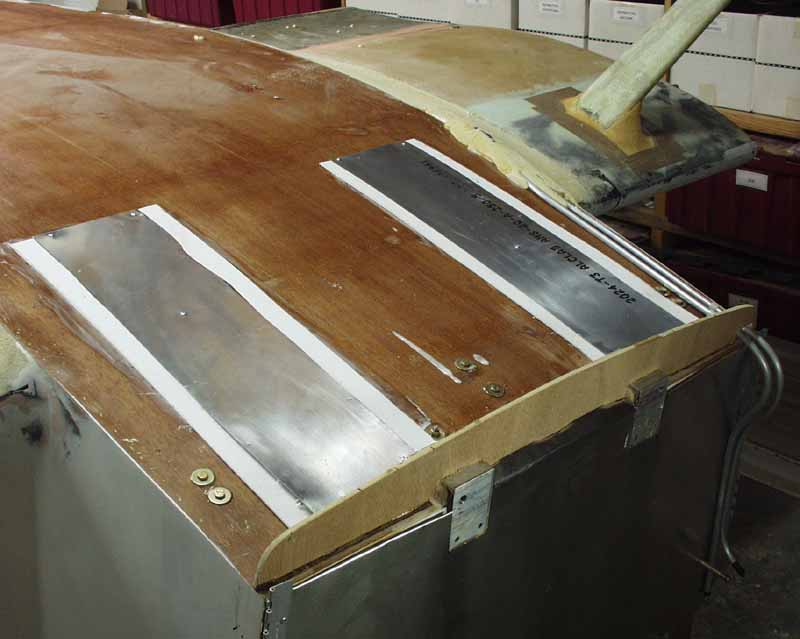
Since I'm running dual exhaust pipes, I epoxied a layer of 1/8" Fiberfrax to the fuselage bottom, and screwed a layer of .015" thick stainless steel on top of that. Stainless isn't a very good thermal conductor, and is very difficult to burn through. At the bottom of the firewall I cut a temporary piece of 1/4" plywood patterned from the cowling to act as a template so that the duct work would match the cowling.

I then glued a layer of 2" urethane foam on top of that, using two part urethane foam from Wicks.
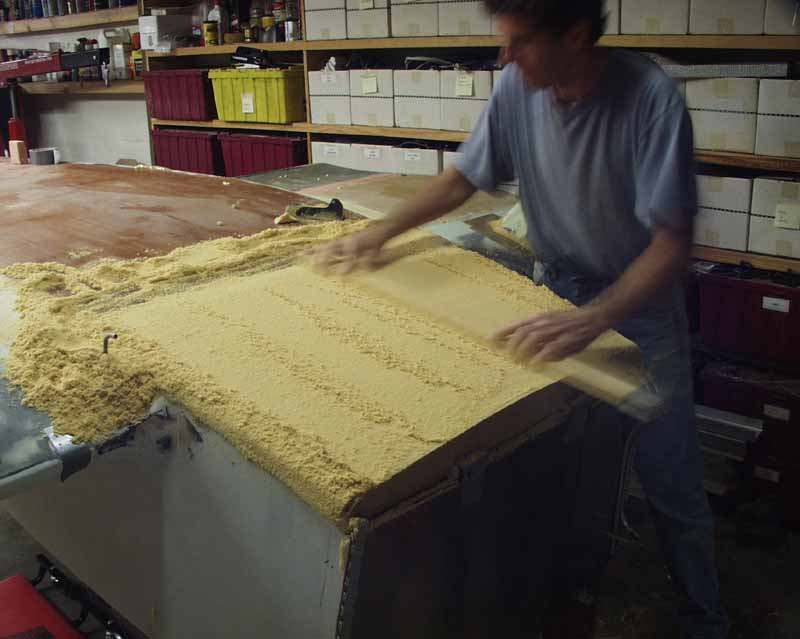
20 minutes later I was almost finished sanding, using a 1x4 with 16 grit floor sander paper glued to it.
Then I went over it with something finer, like 80 grit.
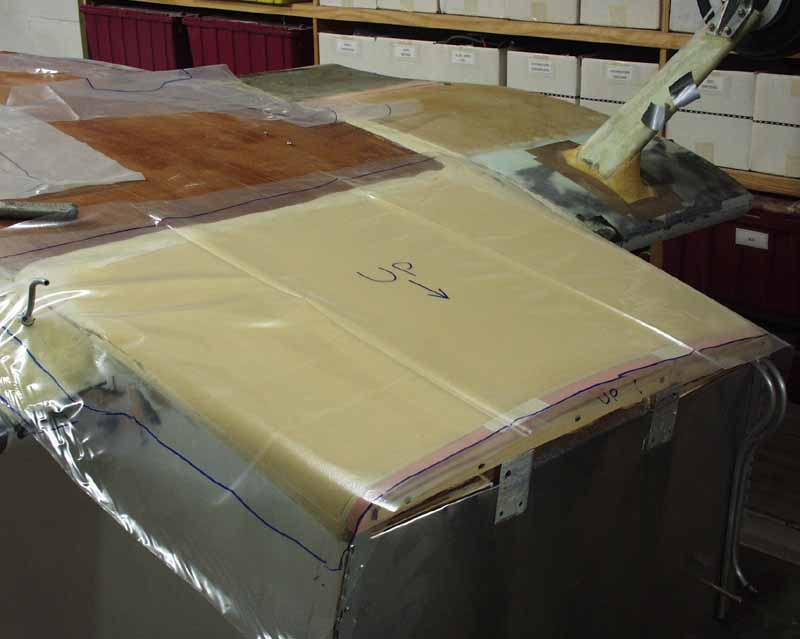
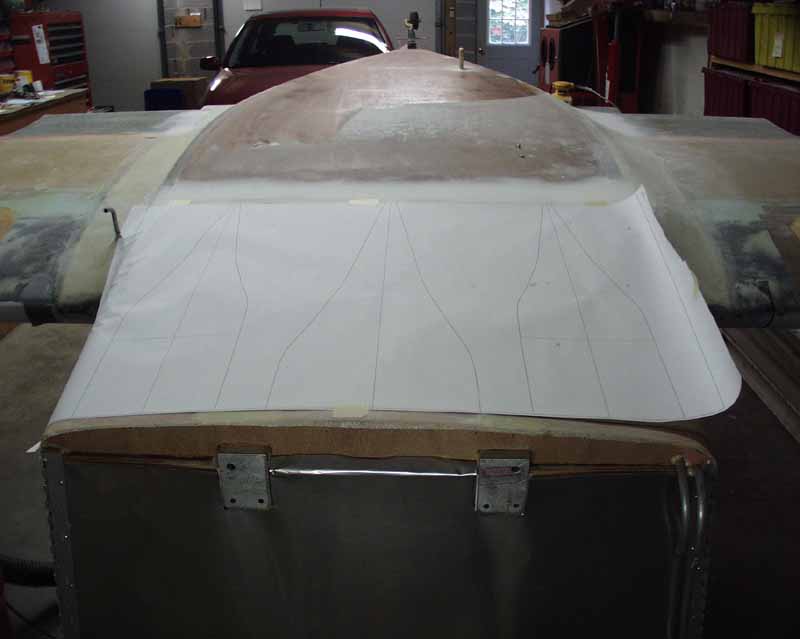
I used the usual plastic method to apply the glass. This involves laying a piece of 4 mil "builder's plastic" from Home Depot over the area, marking "UP" and "forward", and marking the perimeter with a Sharpie.

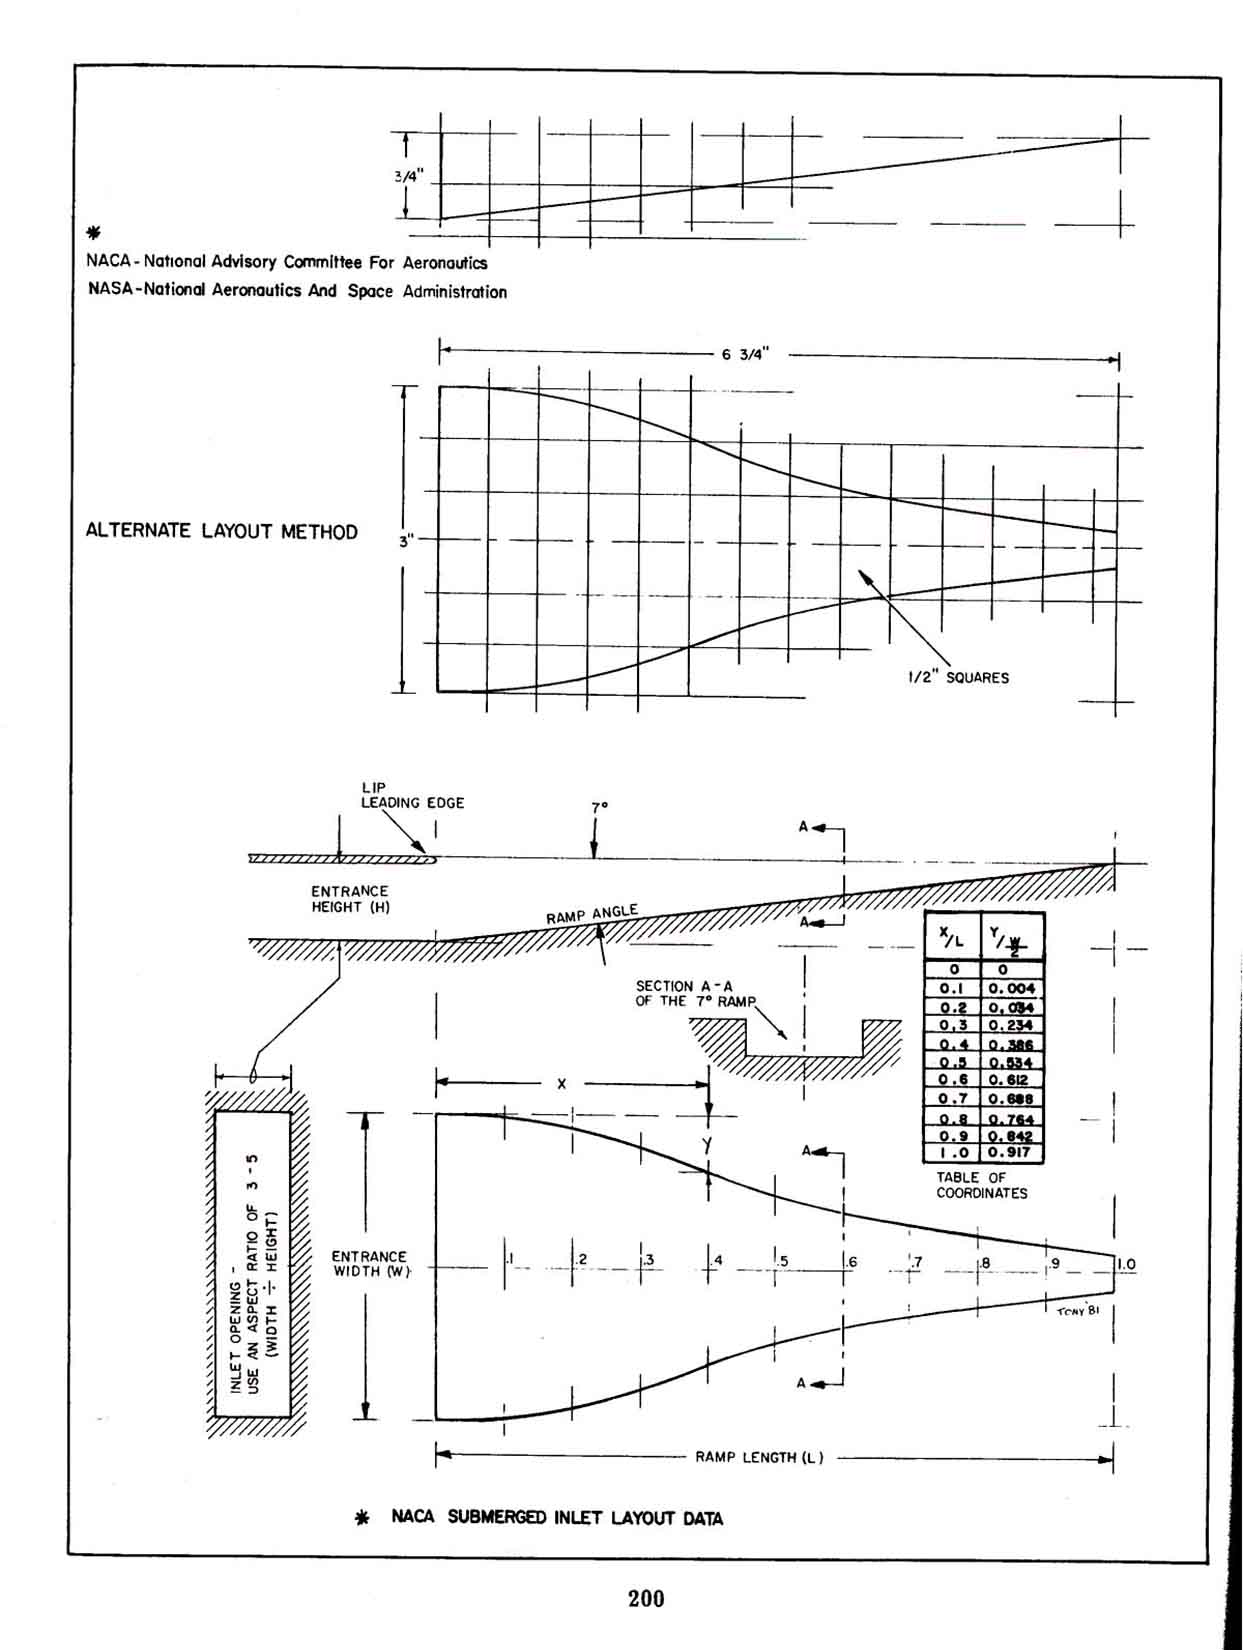
Using a drawing out of Tony Bengelis' "Sportplane Construction Techniques" (and it's also available from a NACA report that originally devised the formula), I plotted out the ducts after determining the depth and length that I needed. The two outer ones start a little late, because I'll add a cover to shield and direct the air around the exhaust pipes. I then traced over the plot onto the plastic, so I'd have an idea where the doubling of the glass needed to be. Since this area of the plane is subject to stuff being thrown up by the prop, I wanted a little extra strength.

I flipped the plastic over and cut the glass a little larger than the blue marks on the plastic, and then added a triangular layer of reinforcement (left over from somewhere) in several places. Here, the plastic is up, and I'm squeegeeing the glass into contact with the microed foam through the plastic.
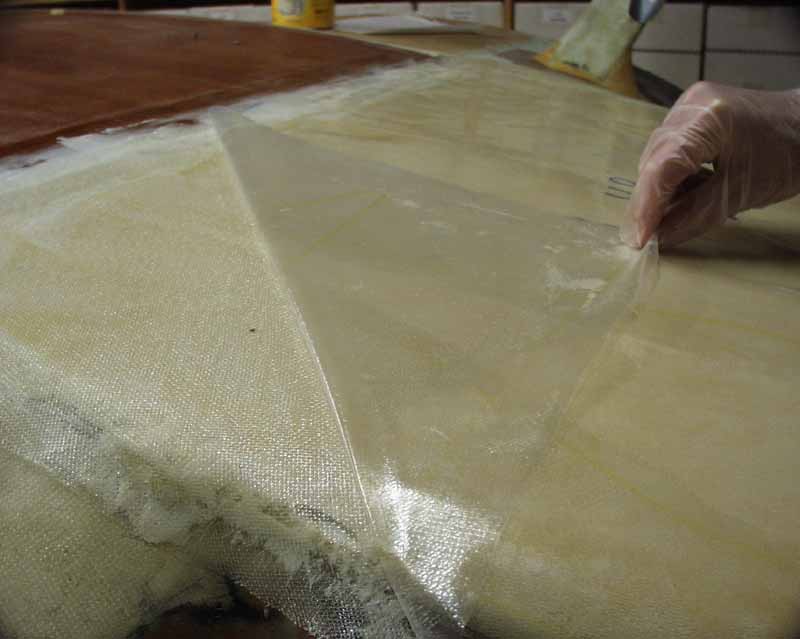
Next step is to pull the plastic away at a 180 degree angle, and then squeegee the glass into contact again. If you have excess epoxy showing up as drips, you've been using too much!

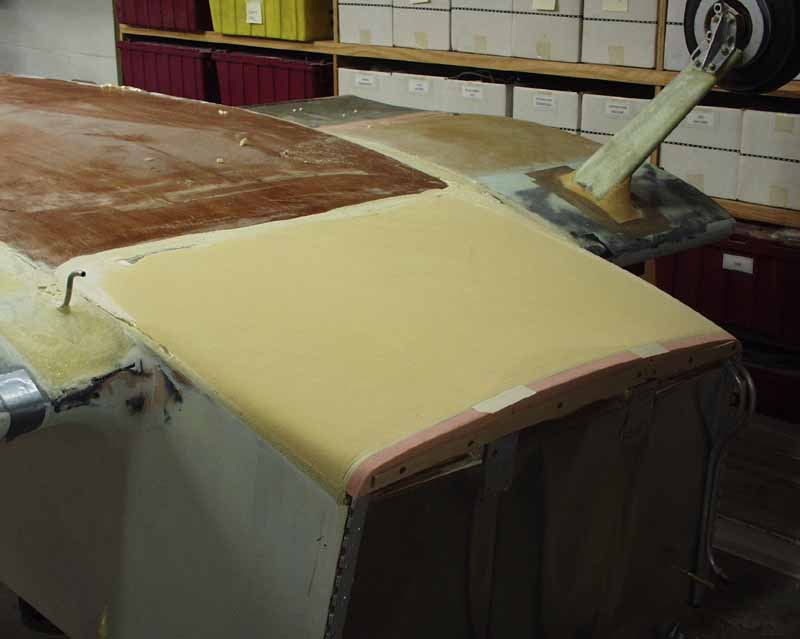
Next I squeegeed a layer of "peel ply" onto that, so minimize pinholes and effort in sanding and finishing.

12 hours later, the peel ply is removed, using the same 180 degree angle to minimize delamination.

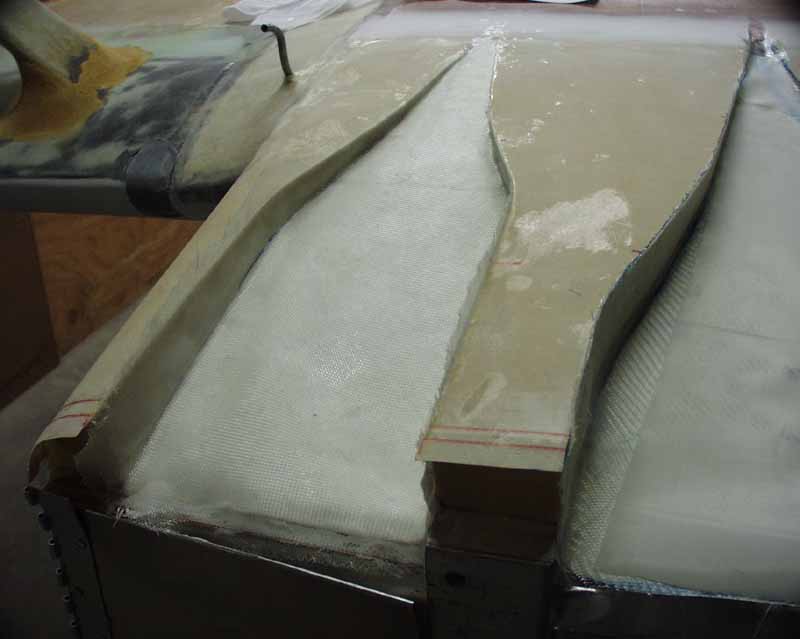
There's one stage finished.
Here's where I put the actual NACA duct plot to work, using it as a template to cut the actual ducts out by cutting along the lines.
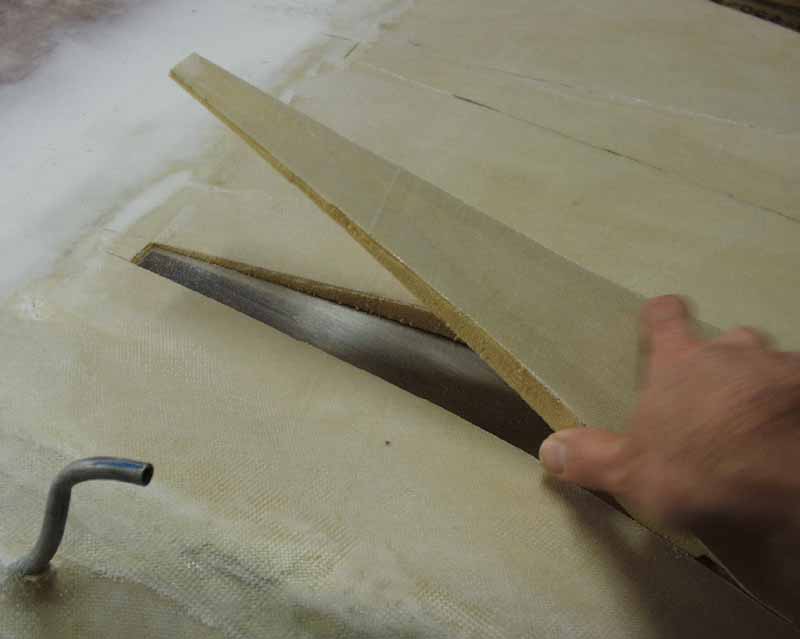
I saved the parts that I cut out. The center one will become a cowl flap, and if my cooling is sufficient, I might just fill it back in entirely, forcing all of the cooling air exiting the cowling to flow around the exhaust pipes, which should keep them cool. Bent tube is the fuel tank vent, which later got a nice little carbon fiber aerodynamic fairing around it.

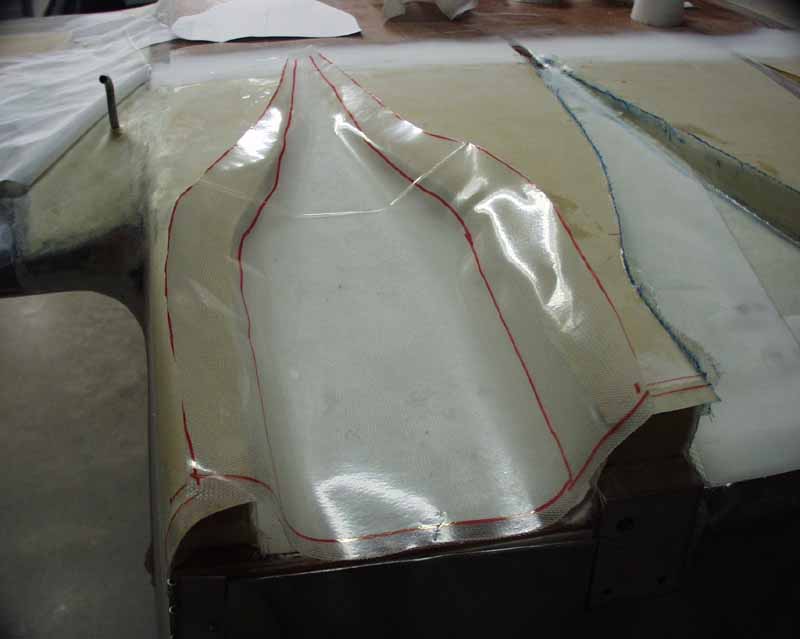
2" tape fiberglass was used to form the edges of the ducts. Here's the layout.

Might as well add another layer of Fiberfrax. It's light, and if something catches on fire, it's nice to have something between your feet and the fire! Here's the test fit.

The tape was positioned on top of microed foam, and then a layer of 5.85 ounce KR cloth was put on top of that, since it's more flexible and can conform to the corner at the bottom. The bolt heads that you see were floxed and microed in place so that the rudder pedals could be removed from above without the heads turning.
And we might as well put on another layer of fiberglass to protect the Fiberfrax, using the same plastic layup method.
I also did the same with the exhaust ducts, which will also get ANOTHER layer of stainless steel after the plane is painted.

After the glass had cured, a razor blade was used to clean up the edges, then sanded to a round shape.
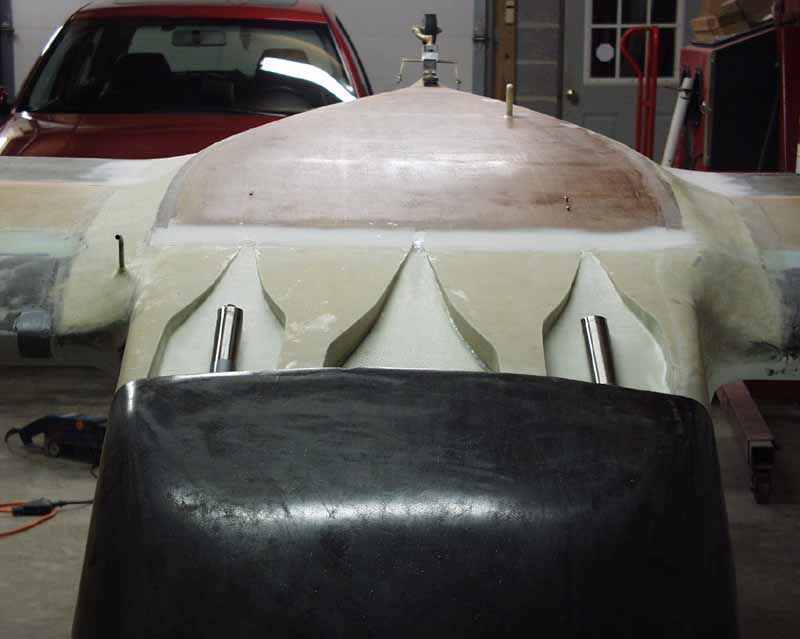
Here's the view with VW tailpipes installed.

I think this will work nicely! Eat your hearts out, VW guys. There's 130 horsepower sitting here...
[update, 2006 - In the NACA tech papers where I got this great idea, it was stated that it worked in both directions, that is scooping off air from outside the plane, as well as returning it back into the airstream. Then I read an article about cooling drag, and it was mentioned that it didn't work so well in reverse (like I have it here). It turns out, that tidbit of information was in a LATER NACA paper, and of course I missed THAT one! The good news is that what DOES work is a simple ramp, constructed just as I've done above, except without the NACA duct shape to it. All I have to do to improve mine is cut them straight back, eliminating the NACA shape and converting them to straight ramps with parallel sides. Now that I have 400 hours on the plane, I can tell you that the exhaust impinging right on the narrow part of the NACA duct makes it black right there, although there is no evidence of the glass melting through. I should mention thought that my plane cools nicely, even with the NACA ducts!
Return to Mark Langford's KR2S Project